From managing how digital display advertising shows up on pages to figuring out what types of content gets engagement, there’s a lot to keep track of when it comes to running a modern commercial website. All these tasks also need to work in tandem without slowing down site performance.
Here’s where Google Tag Manager comes in. GTM is a tag organisation tool that eases the burden of running a complex website for business owners. In this guide we’re going to look in detail at how it works. Let’s start with the basics.
What are Tags?
Tags are the pieces of a website’s HTML code that collect data. This data is then sent to third parties. Because of their core function, tags are versatile information-gathering tools. Tags can record the behaviour of your site’s visitors—from identifying the traffic source that referred them to your site to seeing how far down a page they scrolled.
There are all sorts of tags in a website’s source code performing all sorts of different roles (e.g. heat maps, remarketing, etc). Trying to manually add or edit each one would be an intensive, time-consuming affair that demands a high level of coding expertise to avoid making crucial errors.
What is Google Tag Manager?
Google Tag Manager is free, web-based software that streamlines the process of using and managing tags on a website or mobile app. It lets users add, edit, and disable tags without having to directly interact with a site or app’s source code.
GTM has a host of benefits, including:
- Less reliance on web developers, which is useful for small business owners who lack technical support
- AMP site and mobile app compatibility
- Convenient, all-in-one place for storing and modifying tags
- Template creation for use on different sites and marketing campaigns
- Flexible user access granting for task delegation and sharing info with clients
Defining Commonly Used Terms
The process of using Google Tag Manager can be confusing for a lot of site owners, so let’s define the commonly used terms on the platform:
Tags
As previously mentioned, tags collect data. In action, they are the pieces of HTML code that tell GTM what to do.
Rules
Rules determine when tags are executed or disabled.
Macros
Macros are pre-defined sets of conditions that run rules.
Containers
As the name suggests, containers are where the tags for your site are held. A container is the first thing you need to create upon starting up GTM. It has to be added to the source code for it to show up on each page.
Triggers
Tags require specific conditions to be met before they fire off. These are the triggers, which are made up of events and filters.
An event could be when a visitor clicks a link or scrolls down to a certain point on a page. Filters, meanwhile, allow for granularity regarding when an event should trigger a tag. You can choose operators, values, and variables for your filters.
An operator indicates if an event should be equal to, greater than, or lesser than the value for a tag to fire off. Values can be numerical or be a specific term like a URL or keyword.
Variables and Constants
Variables contain values, and these values have to meet the conditions set through the operators and values for the trigger to execute. Variables can also be used to gather data when a site visitor performs an action, which is then relayed to the data layer. There are multiple variable types in GTM to accommodate countless configurations.
GTM lets you create constant variables so you don’t have to repeat steps to input commonly used ID numbers or tracking codes that will be used in multiple tags.
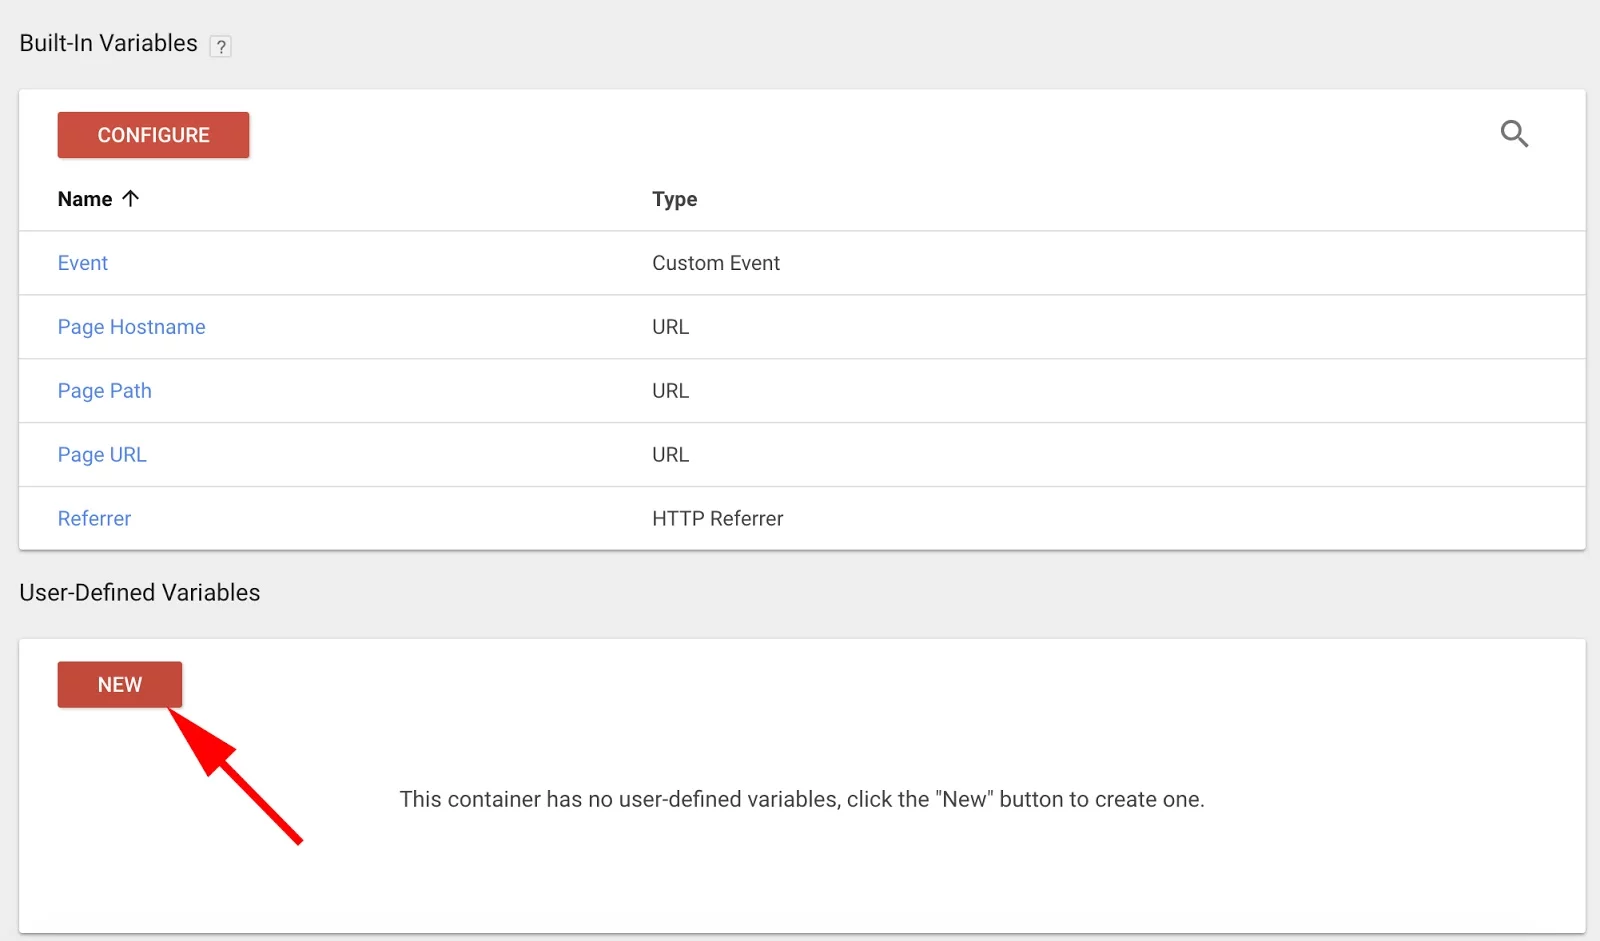
GTM also has built-in variables that you can select, including events, page URLs, and referrers among others, which can be modified later. You can also create your own variables called user-defined variables.
Data Layers
To speed up tag execution, you can create data layers, which let tags bypass having to look through your site’s HTML code to know when they should fire. Data layers can hold all the information tags need in one place. They also keep tags from breaking when a site’s structure is updated.
Read Google’s support document on these components for a more comprehensive breakdown.
The Difference between GTM and Google Analytics
Google Analytics creates reports and presents statistics based on data recorded from user activity on a website. It tells you basic facts about your website and how visitors interact with it, such as the number of people who visited and how many views a page got.
Data is recorded through tags placed on each page. Trying to track for particular visitor behaviour through Google Analytics is complicated, as unique tags have to be put in place for each behaviour.
Google Tag Manager lets you manage tags so they only fire when you want them to. You can be as specific as you want about what data you want to be presented, which can be sent to Google Analytics.
Step-by-Step Guide to Google Tag Manager
Now that we have covered the key terms, definitions, and benefits associated with GTM, we can finally go over each step to using GTM.
1. Setting Up Your Account
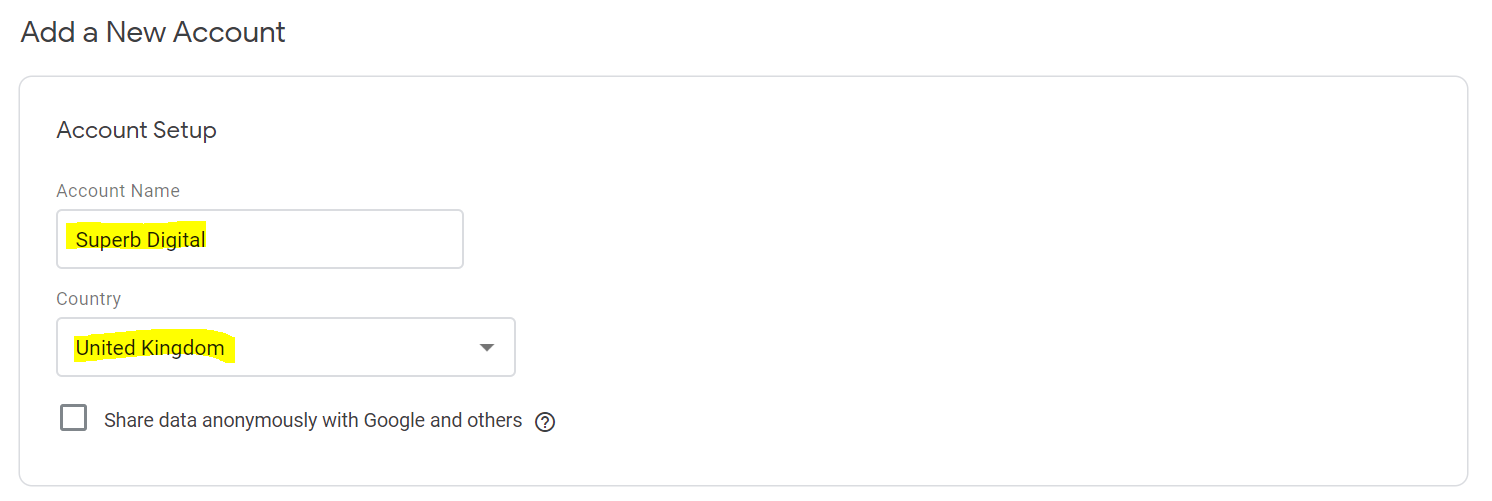
Go to tagmanager.google.com and click on “Click here to create an account” or the “Create Account” button.
Type your company’s name in the Account Name box. Then, select the country where your company is based in the dropdown box.

2. Setting Up a Container
Type your domain name in the Container name box.
You can manage multiple GTM accounts with just one container, but Google recommends having one container per domain.
Choose the appropriate target platform, your choices are Web, iOS, Android, and AMP.

3. Copying and Pasting Provided Codes
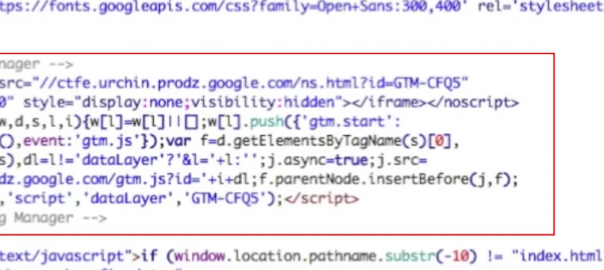
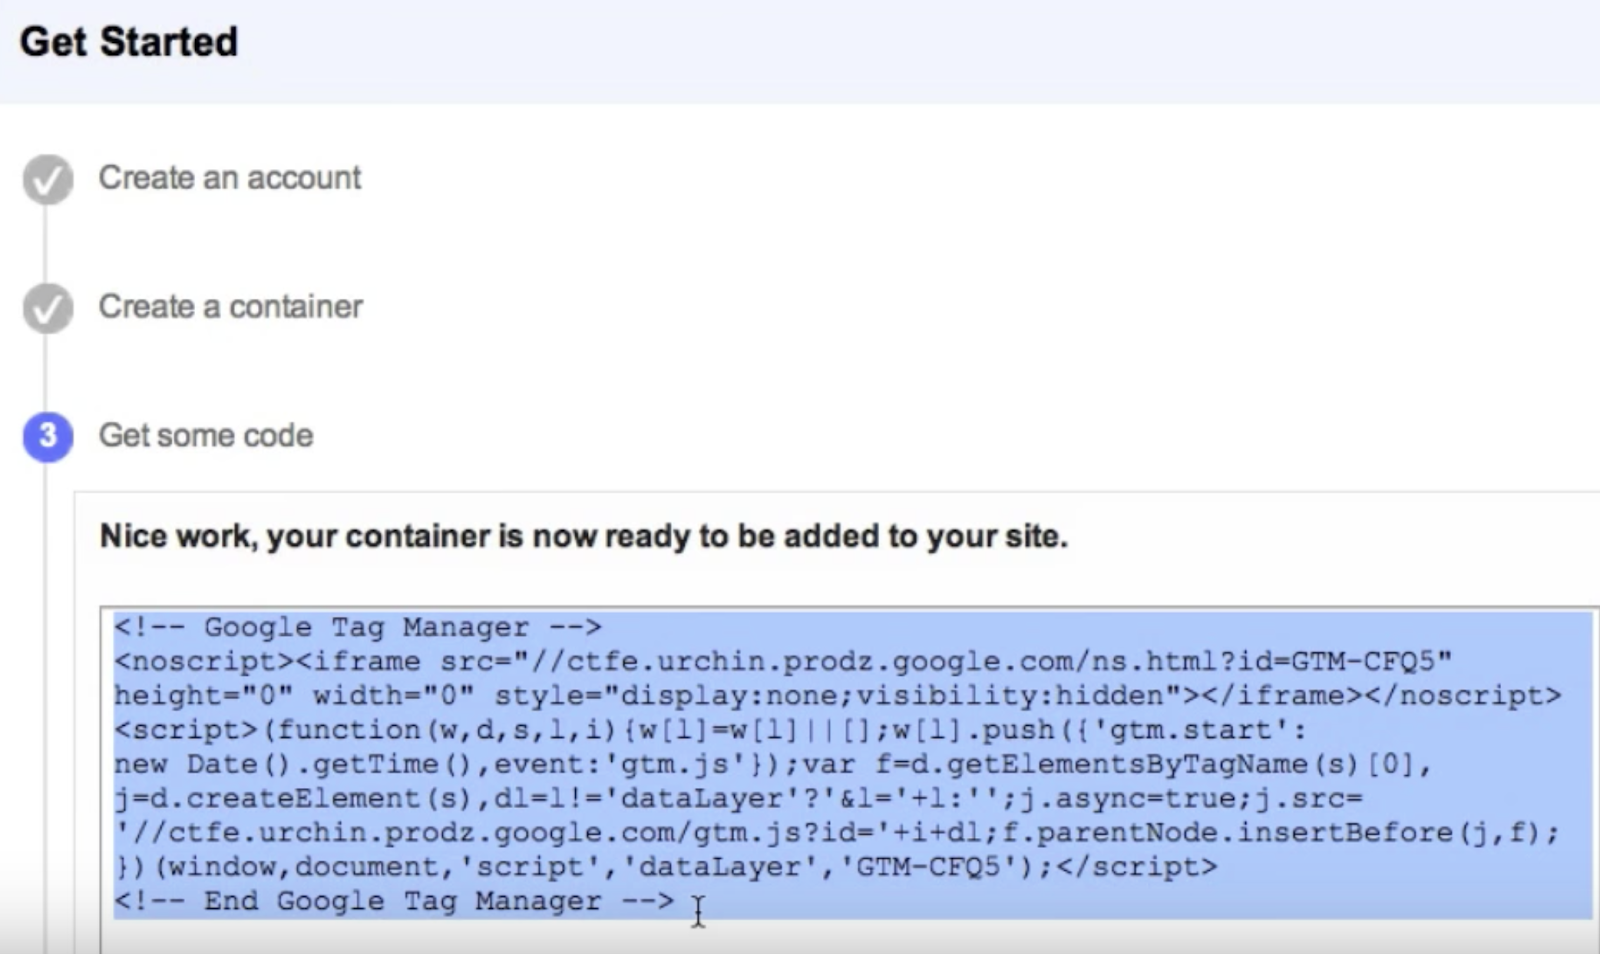
GTM will give you codes for you to copy and paste onto every page of your site. The first code has to be in the <head> of the page, and the second code has to be right after the opening <body> tag. You can do this now or later.
4. Creating Tags
You can create all sorts of tagging configurations to drill down into the exact data that you want to collect.
Follow Google’s recommended naming format to keep things clear and organised:
Tag type – Detail – Location
For example, “Google Analytics – Download – Resources page” could be for tracking how often a white paper gets downloaded on your Resources page.
a. Create a new tag in the dashboard
Click on the Add a New Tag link in your dashboard.
b. Configure the tag
Provide a title for the tag on the top left corner, then click “Choose a tag type to begin setup…” in the Tag Configuration section.
c. Choose the type of tag
You are given dozens of tag types to choose from. For the purpose of this guide, you can choose Universal Analytics or Classic Google Analytics. You can also customise your own tag type.
d. Link to GA tracking
To track your tag with Google Analytics, type your Web Property ID in the corresponding box. You can find this ID in your GA account.
You have multiple Track Type options to choose from, but for this guide, pick Page View.
e. Choose the trigger
In the Triggering section of the page, click “Choose a trigger to make this tag fire…” then the + sign in the upper right corner.
Name your trigger and click on Trigger Configuration.
Choose Page View as the Trigger Type and All Page Views under “This trigger fires on” for this tutorial. This will trigger the tag every time any page on the site is viewed.
f. Save the tag
Click Save on the top right corner when you’re done configuring the tag and trigger. Then click Submit in the same location to make the tag work.
Select Publish and Create Version then click Publish to get the tag to start working.
g. Keep the tag name and description organised
Once you’ve saved the tag, you’ll be asked to give a name and description. This is useful to keep track of whatever changes you might make.
h. Double check if tag is in ‘Version Summary’
With the tag saved, published, and given a name and description, you should see 1 tag displayed in the Version Summary report.
5. Testing the Tags
To preview your tags and see if they work before publication, click “Preview” in the upper right corner. You should see an orange banner that says you are in Preview mode.
Go to the site you’re testing, and you’ll see a Debug panel at the bottom.
There should be at least three events. If any one of “Page View”, “DOM Ready” and “Window Loaded” is missing, you need to go back to the tag creation section to fix something. Click the tags in the Debug panel to get a glimpse of what could be wrong.
Setting Up GTM with Google Analytics
1. Remove the GA code from your website’s pages and create a variable for your GA Tracking ID.
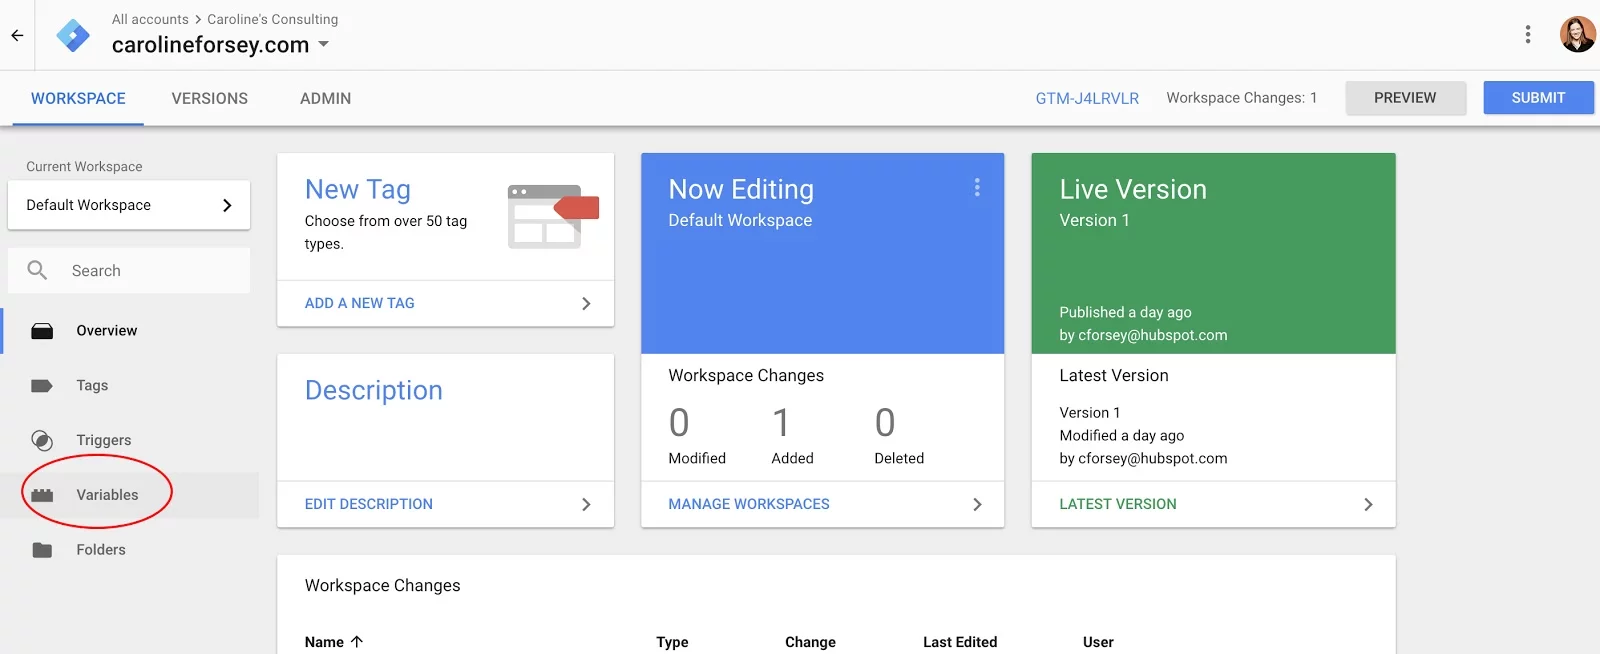
2. In the GTM dashboard, click Variables on the menu to the left.
Source: Hubspot
3. Click the New button in the User-Defined Variables section.
Source: Hubspot
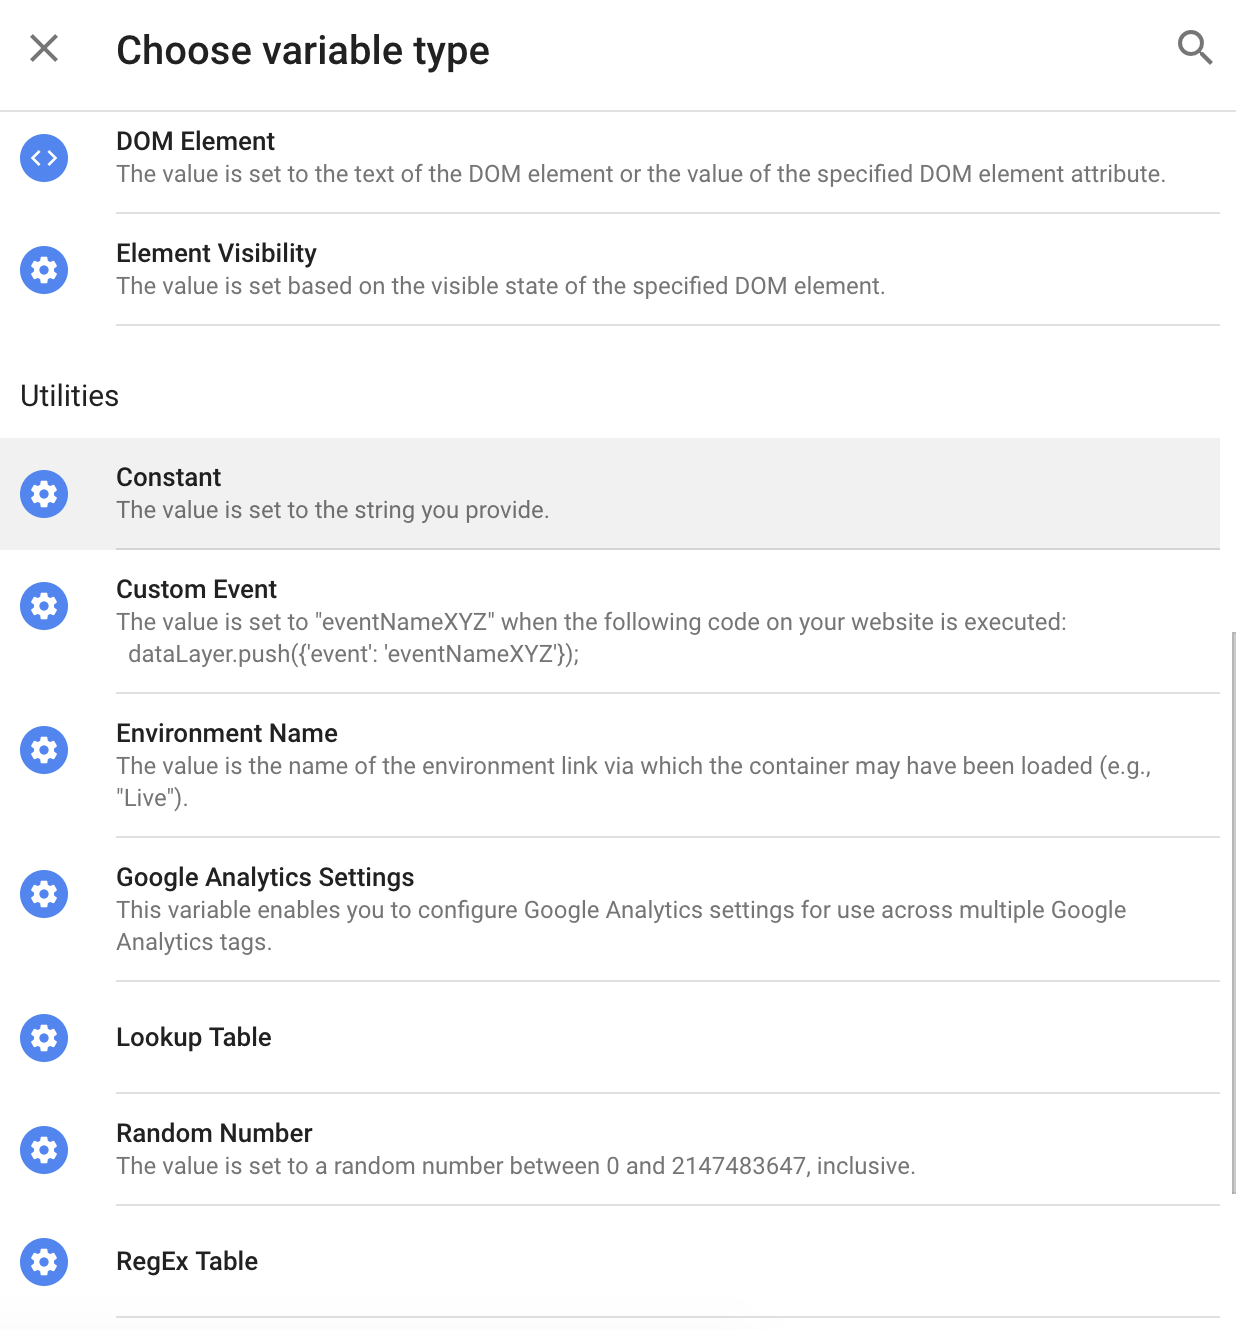
4. Type GA Tracking ID as the name then click “Choose a variable type to begin setup…”
5. Select Constant under Utilities when asked to choose variable type.
Source: Hubspot
6. Type the GA Tracking ID in the Value box, and click Save in the upper right corner.
7. Now go back to the GTM homepage and click on Tags, then the tag you created.
8. Click the + icon next to the Web Property ID box.
9. When prompted to choose a variable, pick GA Tracking ID, which should be the first option since you just created it.
10. The Web Property ID box should then show GA Tracking ID. Click the Save button to complete the process.
Setting Up GTM with WordPress
If you paid for WordPress Business, there are plug-ins available that can do this for you. But there is also a manual way to do this:
1. Go to your GTM homepage and look for your GTM code. It should be highlighted blue next to Workspace Changes.
Source: Hubspot
2. Go to your WordPress site. Paste the code underneath the <body> tag on each page.

Source: Hubspot
Digital & Social Articles on Business 2 Community
(54)
Report Post