Are you promoting your pins yet? Promoting Pins is a great way to ensure your best images get seen by your target audience on Pinterest. Before promoting Pins was available to the public, it was usually a guessing game as to how your pins could go viral. Now you have control over which pins are shown, under which search terms, to whom, and at whatever price per click you feel comfortable with. It’s so easy to promote your pins and you have control over how much you spend and who sees your pins.
The following steps share how to use Promoted Pins and show how to monitor your results after the Promoted Pins are approved and running.
First, here’s an overview of the Promoted Pins process that Pinterest maps out on their ads introduction page.
Step 1: Pick a Pin to promote
You have to pick one at a time.
Step 2: Decide who sees it
You have control over what keywords lead to your pin, where the target audience lives, what language the audience speaks, what device they see it on, and their gender.
Step 3: Pay for visits
Next you decide what price you’re willing to pay per click. You only pay when someone clicks through the pin to your destination URL. You also set the maximum spend per day and set campaign dates.
Step 4: Track what’s working
After your pin is set up, billing is set up, and the image is approved, you can track the progress of the campaign through the Pinterest ads dashboard. I recommend running multiple Promoted Pins campaigns as A/B tests to see which pins, CPCs, and keywords are performing best. If something’s not working, tweak your settings. You have total control.

Step 1: Pick a Pin
Select an image that follows these guidelines:
- You own the rights to it.
- It’s pleasing to the eye and is a good quality image.
- It has ideal dimensions (vertical, 720 x 1200 pixels is best).
The pin you wish to promote does not require these characteristics to be successful but these help:
- Text overlay (I highly recommend for DIYs, article pins, and recipe pins)
- Small brand logo (Shown to help the pin perform better when small and tasteful)

Choose a pin to promote (must be an image you own rights to).
Next, make sure to optimize the pin’s description before promoting it. To do so, simply go back into Pinterest, search your pins and find the pin you wish to promote. Edit the description to be 1-3 sentences long with popular and relative keywords. You can also add one hashtag and one @ mention if you desire. Double check to make sure you’ve added the correct URL to the pin before moving on!

You can also see ‘30-day most clicked’ pins or ‘30-day most repinned’ pins to see what kinds of images are already working. If you still don’t see something you’d like to promote, search in the upper right corner for keywords your ideal pins might have.
Step 2: Add more details
Now it’s time to set up when the pin is shown and to whom. If you plan on promoting multiple images, I recommend creating a spreadsheet document, one per category (food, fashion, DIY, etc…), with a list of terms in a column that you’d like to have your images show up with when searched. Pinterest recommends a minimum of 30 terms and we recommend a minimum of 50.
Example: If you plan on promoting multiple women’s fashion pins, create a ‘Women’s Fashion Promoted Pins Terms’ spreadsheet with a list of words all going down one single column that you’d want your Promoted Pin to show up for, like ‘women’s fashion,’ ‘style,’ ‘fashion,’ ‘spring style,’ ‘cute outfit,’ etc… After the spreadsheet is done. Go to Import terms in the upper right corner of this section, choose to separate with ‘line breaks’ instead of commas and Voilà!

Add more details to your campaign with targeting by keywords, audience location, language, device, and gender.
Now you can narrow your target audience by location, language, device, and gender. If you prefer to just set it to everyone possible, you don’t need to edit anything here.
Step 3: Pay for visits
Next you decide your maximum CPC (Cost per Click) bid. You will only pay when someone clicks through the pin to your associated URL. The nice thing about Promoted Pins is that Pinterest follows a second-price auction model. So if you set your maximum CPC bid as $ 1.00 per click, and your competitor’s next highest bid is $ 0.29, you’d actually be paying $ 0.30 per click.
The final steps are to pick a campaign name, start and end dates, and a daily budget (important!) You’ll never pay over your daily budget. You can tweak the dates and daily budget at anytime so you stay aligned with your goals and budget as you follow how the campaigns are performing.

Step 4: Track what’s working
Just set up billing and you’re done! Wait for approval from Pinterest (usually takes 12-48 hours), then you can start to monitor the results. Below I’ve shared a screenshot of what the campaign dashboard looks like. (Note: This was taken after we ran our campaign). The dashboard shares total impressions, repins, clicks, CTR (Click-Through-Rate), average CPC (Cost per Click), average eCPC (earned CPC), and spend.
Make sure to check the ‘Average CPC’ section to see how much you’re paying per click. Keep an eye on ‘Spend’ to make sure your on track to hit your ideal budget by the end of the campaign dates. If not, increase daily budget, and CPC if you’d like, and if it’s too high just lower the daily budget, and CPC if you’d like. You’re having a successful campaign when you’re able to get a high number of impressions, repins, clicks, and conversions.

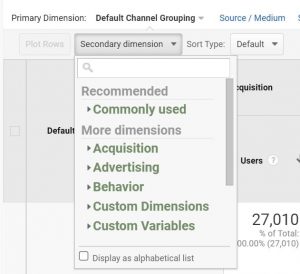
To really track results and effectiveness, add (new!) conversion tracking to your Promoted Pins campaign to see how many sales are converting from Promoted Pins specifically. Utilize Google Analytics to see how many conversions are resulting from Pinterest as a whole. Next week I’ll share detailed instructions on conversion tracking.
Any questions? Comment below! Have you tried Promoted Pins yet? How was your experience? Read 11 Tips for Multiplying Your Pinterest Following in 2015 and Instagram Tips & Tricks 2015 for more social media tips and examples!
(215)
Report Post


